
Tips for Photographing Your Own Children
- Jan 21, 2020
- 4 min read
Updated: Mar 8, 2021
When teaching my Introduction to Digital Photography classes, I always start by asking each member of the group to introduce themselves and to say what genres of photography they hope to improve on. The most popular answer I get is "children".

The funny thing is, that's exactly how I got into photography in the first place. I wanted to create meaningful memories of my kids, capturing "real" moments and creating images that were more than just snapshots.
I thought I would share some of the most common tips that I give to my students when they ask me for advice on photographing their own children. By the way, these tips apply to all types of cameras, so no need for a fancy expensive camera to apply these guiding principles!
Here we go!
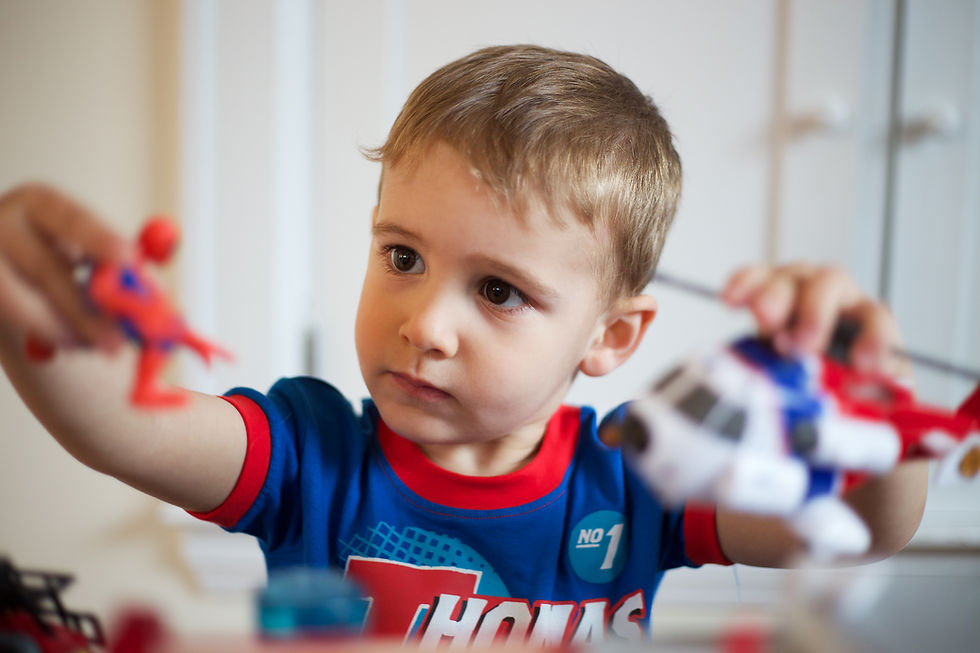
Focus on the Eyes

As human beings, when we look at someone, we're wired to try to make eye contact first... It's just human nature! And when we look at a photograph, our eye automatically goes to the sharpest part of the image first. This is why it is crucial that your subject's eyes are in focus. Otherwise, it just won't look right. This is one of the most important rules in photography. Whether you're photographing a person, a pet or a bronze statue of a historic figure, make sure those eyes are in focus.
If your subject's head is at an angle, and one eye is closer to the camera than the other, the rule is to focus on the eye that's closest to the camera. The eye that's further away can be slightly out of focus, that's fine... but make sure the closest eye is sharp.
Get Down Low
At least 9 times out of 10, I crouch down and sit on my heels when shooting kids. I find that it almost always makes the images better and more engaging to the viewer when I'm shooting from their level. I always tell my students that good photography is making people see an everyday things in a different way, so why not bend your knees and capture an image of your child from a different point of view than if you were just normally standing up? For the viewer, this helps create a stronger connection with the subject, and makes for a better "storytelling" image.
And when you think about it, do you want the floor to be the background to ALL of your kids' photos?
Use Props!
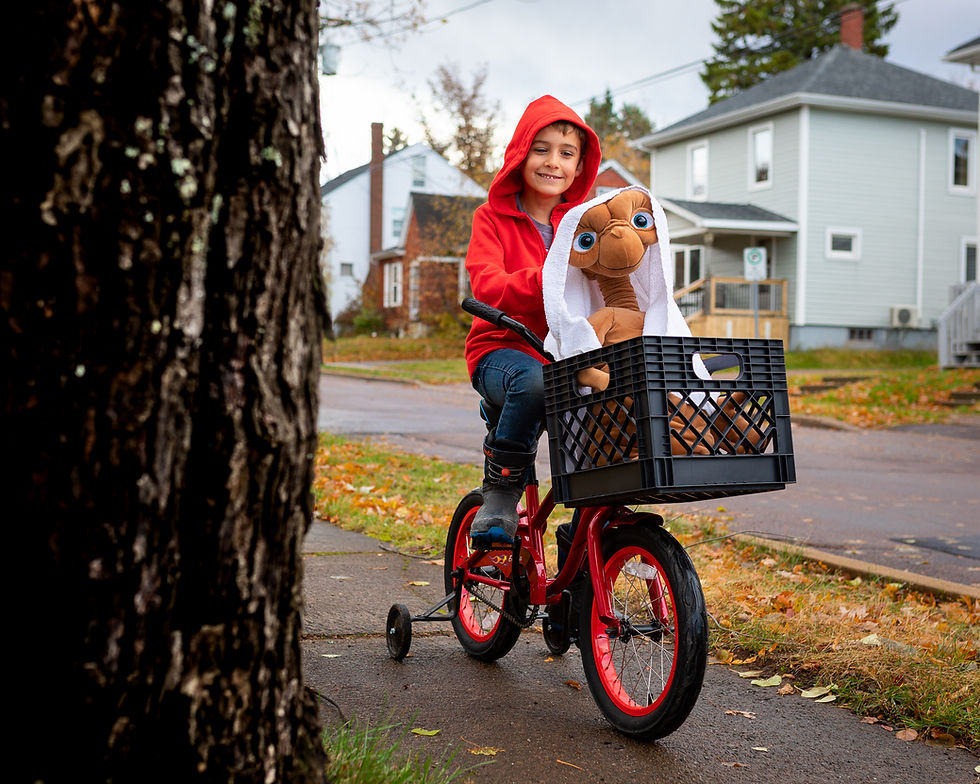
Props can make your photos more interesting, and it can help your kids be more involved in the creative direction your photos will take too. Let them come up with ideas on what props to use, and how to use them in a photo. If your kids feel like they are having some creative input into your photos, then they will be more likely to participate, and you'll get better shots because of it. In this case, my son Samuel proudly dressed as Eliot and took E.T. for a bike ride as an homage to the classic Stephen Spielberg film.
Shoot with the Sun Behind your Subject

I think most beginners in photography have a tendency to shoot with the sun behind their backs (I'm guilty of having done that too when I was starting out). What this does is it blinds your subject and it will make them squint. The other problem is that the direct light from the sun can create harsh shadows on the face, and that's typically not a desired look.
With the light source coming from behind the subject, the light hitting their face is much softer, giving a nicer look. Also, the rim light on top of their head will create some separation between them and the background. The other obvious advantage of shooting with the light source behind your subject is they won't be blinded by the light!
When Indoors, Window Light is the Best!
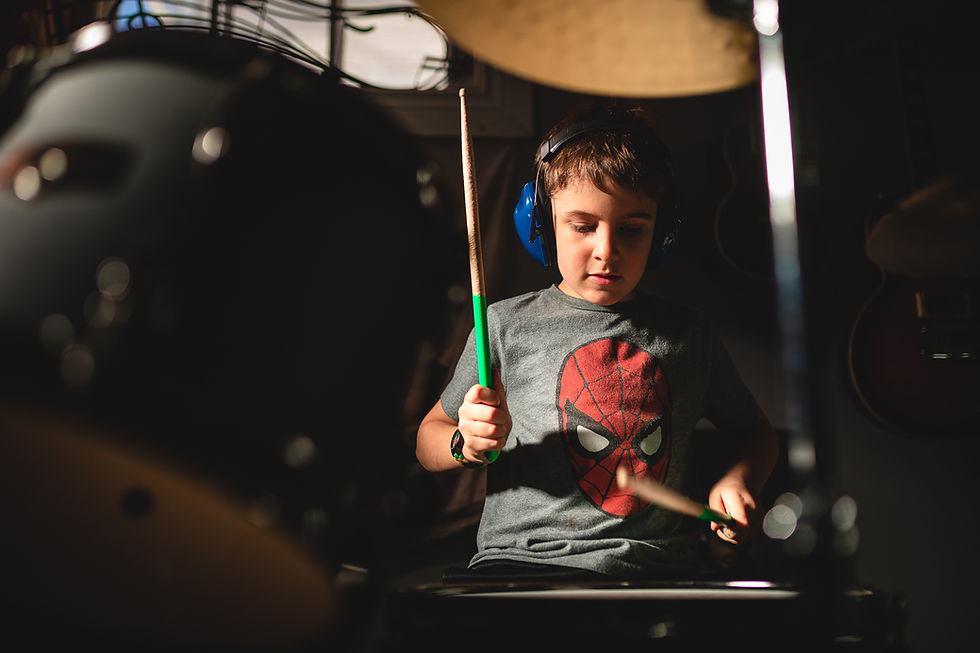
When you're indoors, the best light you can shoot in is hands down window light. I say it's the best light because it looks 100% natural and it's way cheaper and easier than shooting with flashes. Just make sure to turn off artificial lights, as they may not be the same colour as the window light, and will end up messing up your colour balance.
If possible, angle your subject so that the light source comes from the side. This will give the impression of adding depth to your subject. Keep in mind that the viewer's eye will be attracted to the brightest area of a photograph, so try to avoid having other areas in the photograph to be lit brighter than your subject. Ear plugs recommended!
Capture All Moods

What a great reminder of what it was like to have a less than 1 year old in the house! That's what photographs are for in the first place: creating memories. While I obviously shoot more photos of my kids when they're in a good mood, I find that the occasional ugly-crying photo helps tell the story of what they were like in their early years. Just another example of an everyday moment captured on camera.
This actually happens to be one of my favourite images of my son Joel! In fact, I used this photo to create invitations to his first birthday. The caption said: "This will be my face if you don't come to my birthday". Everyone showed up!
Bribe Them!
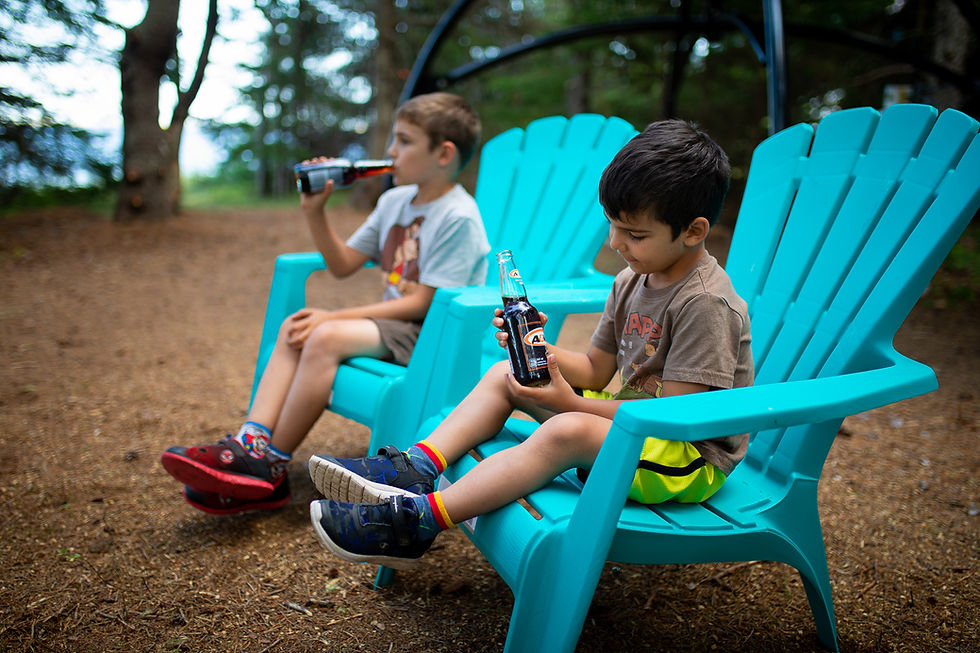
Don't overdo it, of course... but sometimes, allow yourself to offer your kids a little treat if they cooperate with your photo shoot. And when they're enjoying their little reward (in this case, a cold and delicious root beer), take a few photos of them enjoying that little treat... perhaps it'll make for an even better photograph than the ones you took minutes before!
Make it Fun!


Kids will not be willing to participate if they feel like it's a chore. Even if what you're hoping for is a sweet smile, let them have fun first. I like to have them do a "funny face competition". It's is a great way to make them relax and enjoy the photo shoot. The funnier the face, the better!

Just be patient, and go along with it. And when they finally burst out laughing because they find themselves to be soooo funny, there's your opportunity to capture a sweet, real genuine moment — unlike the fake "say cheeeeeese" smiles.
My next Introduction to Digital Photography class begins on February 19, 2020 in Moncton, NB. The class covers composition, storytelling and technical settings. There are only a few spots remaining, so if you would like to take this course, register before it's too late!


Comments